Building an Endless Runner Game with Three.js, Mixamo, Vite, And PlanetScale - Part Two (The Running Scene)


Table of contents
- GitHub Repository
- Setting up the Running Scene
- Different ways to build an endless runner game
- Setting up the Lights
- Importing the Wooden Cave
- Importing the Player
- Making the Player Run
- Spawning the Wooden Cave endlessly
- Moving the Player left and right
- Making The Player Jump
- Making The Player Slide
- Creating Obstacles
- Moving the Obstacles Towards the Player
- Detecting Collisions With The Obstacles
- Adding the coins
- Calculating And Displaying The Scores And Coins
- Implementing Game Pause, Game Over, and Restart
- Giving the Player three Seconds Head Start before Spawning the Coins and Obstacles
- Increasing the speed as the Player runs and hiding the Player Box
- Saving the High Scores and Coins into the LocalStorage
- Detecting Touch Swipe
- Adding a temporary Loader
- Summary and next steps
This is the second article in a series titled "Building an Endless Runner Game with Threejs, Mixamo, Netlify, and PlanetScale."
This tutorial series is divided into the following five sections:
In the previous section, we learned how to set up the project using Vitejs and ESLint. Then, we created our first scene and an animated cube. We also learned how to download game characters and animations from Mixamo.
In this part of the series, you will learn how to animate and import 3D models into a scene. You will also learn how to save scores and coins collected, handle game over and restart, and detect collisions with the player.
GitHub Repository
The GitHub repository containing the finished code of this game is here: https://github.com/tope-olajide/cave-runner, and the game can be played here: https://cave-runner.netlify.app/.
Note that I divided this project into different branches on GitHub. This source code for this section is here: https://github.com/tope-olajide/cave-runner/tree/ft-running-scene. Using Netlify, each branch of this project can be deployed. The code for this specific branch is deployed at the following location:: https://deploy-preview-2--cave-runner.netlify.app/
Setting up the Running Scene
The Running Scene is where the main action and most of the fun parts of the game will take place.
To get started, create a new folder called scene in the src directory. This is where we will store all of our scenes. Inside the scene folder, create a new file called RunningScene.ts and add the following code.
import { Scene } from 'three';

export default class RunningScene extends Scene {
  async load() {

  }

  initialize() {

  }

  update() {

  }

  hide() {

  }
}
The RunningScene currently has four empty methods: loadModels(), initialize(), update(), and hide(). Every scene in this game will have all four methods.
load() Method
This method will be used to import all the 3D assets for a particular scene and everything that needs to run only once throughout the lifecycle of the game. This method is the first to be invoked at the beginning of the game, and it will only do so once, and that will be when the game is loading.
hide() Method
This method will be used to clean up and hide a scene and all its contents once we are done using it. It will be called once throughout the lifecycle of a scene and that is when we are done with the particular scene.
initialize() Method
The initialize method is the first method that will be invoked once a scene is loaded. This is where we are going to set up everything that is needed in the scene, and unhide every object that is hidden with the hide() method. This method will be called once throughout the lifecycle of a scene.
update() Method
This method will handle everything that needs to run over and over again every time the screen is refreshed (up to 60 times per second depending on the capabilities of the browser). This method will be called inside Window.requestAnimationFrame() in the main.ts file.
Most game engines have methods like these (or similar) built in by default, but since threejs is not a game engine, we have to create and manage these methods ourselves.
Let's delete the cube example created in the main.ts file and add the following code:
import { WebGLRenderer, PerspectiveCamera } from 'three';

import RunningScene from './scenes/RunningScene';

const width = window.innerWidth;
const height = window.innerHeight;

const renderer = new WebGLRenderer({
  canvas: document.getElementById('app') as HTMLCanvasElement,
  antialias: true,
  precision: 'mediump',
});

renderer.setSize(width, height);

const mainCamera = new PerspectiveCamera(60, width / height, 0.1, 1000);

function onWindowResize() {
  mainCamera.aspect = window.innerWidth / window.innerHeight;
  mainCamera.updateProjectionMatrix();

  renderer.setSize(window.innerWidth, window.innerHeight);
}

window.addEventListener('resize', onWindowResize);

const runningScene = new RunningScene();

const render = () => {
  runningScene.update();
  renderer.render(runningScene, mainCamera);
  requestAnimationFrame(render);
};

const main = async () => {
  await runningScene.load();
  runningScene.initialize();
  render();
};

main();
I have created a new function called main(). This function will load the assets for the running scene, initialize them, and call the render() function. The requestAnimationFrame() function takes the render function as a callback and calls it repeatedly up to 60 times per second. One major advantage of requestAnimationFrame() is that its callback function (in this case, render()) is paused in most browsers when the page is running in the background. I have previously explained the roles of the WebGLRenderer and PerspectiveCamera in a previous section.
In case you got the "Unable to resolve path to module" error after importing the RunningScene in the main.ts file, you can fix it by updating the rules and settings in the .eslintrc.json:
{
  "env": {
    "browser": true,
    "es2021": true
  },
  "extends": [
    "airbnb-base"
  ],
  "parser": "@typescript-eslint/parser",
  "parserOptions": {
    "ecmaVersion": "latest",
    "sourceType": "module"
  },
  "plugins": [
    "@typescript-eslint"
  ],
  "rules": {
    "import/extensions": "off"
  },
  "settings": {
    "import/resolver": {
      "node": {
        "extensions": [
          ".ts"
        ]
      }
    }
  }
}
Different ways to build an endless runner game
I'm aware of two approaches that can be used to create an endless runner game.
The player and camera are moved forward while new objects are spawned in the game world ahead of them. As the player and camera pass these objects, they are removed from the screen to conserve system memory. This process ensures that there is always a new objects in front of the player and camera and none are left behind.
An alternative approach to building an endless runner game is by keeping the player and camera stationary and moving the objects in the game scene towards them. This creates the illusion of the player running forward, while in reality they are stationary. When objects spawned towards the player are no longer visible, they are removed and respawned.
This tutorial will demonstrate the use of this method.
I will be using the second method in this tutorial.
Setting up the Lights
Before we can actually see any object in the scene, we need to set up the light. Let's open up the `RunningScene.ts` and import the lights :
import { Scene, DirectionalLight, AmbientLight } from 'three';
export default class RunningScene extends Scene {
    async load() {
        const ambient = new AmbientLight(0xFFFFFF, 2.5);
        this.add(ambient); const light = new DirectionalLight(0xFFFFFF, 2.5);
        light.position.set(0, 40, -10); this.add(light);
    }

    initialize() {

    }

    update() {

    }

    hide() {

    }
}
Two lights, an ambient light and a directional light, have been imported into the scene.
The ambient light: This light evenly illuminates everything in the scene. The ambient light takes in 2 arguments, the light's color and intensity. I used white as the color and 2 as the intensity. The higher the intensity, the brighter the objects in the scene becomes. There's no need to set the position for ambient light since it spreads evenly everywhere in the scene. Ambient light cannot cast a shadow.
Directional Light: Directional light is a light source that emits light in a specific direction. It is frequently used to imitate daylight. Unlike ambient light, directional light can cast shadows (rendering shadows requires a lot of calculations which may cause a heavy CPU and GPU usage, so I will not be enabling it for this project). Directional light takes in two arguments, color, and intensity. Right before the camera, I set the position to -10 on the z-axis.
Importing the Wooden Cave
In this part, we will import the wooden cave, scale it, and place it in front of the camera and light. Before that, let's import the FBXLoader and Object3D objects:
import {
  Scene, DirectionalLight, AmbientLight, Object3D,
} from 'three';

import { FBXLoader } from 'three/examples/jsm/loaders/FBXLoader';
The FBXLoader object will be used to load all the 3D models used in this project since they are all saved in FBX format while the Object3D class will provide the methods and properties for manipulating our 3D objects in the scene.
Now let's create a new object from FBXLoader() called: fbxLoader and a new object from Object3D() called woodenCave inside the RunningScene . The woodenCave object will be used to store the Wooden cave object that will be used in this scene.
  private fbxLoader = new FBXLoader();

  private woodenCave = new Object3D();
We can now import the wooden cave within our load method as follows:
    this.woodenCave = await this.fbxLoader.loadAsync('./assets/models/wooden-cave.fbx');
    this.woodenCave.position.set(0, 0, -500);
    this.woodenCave.scale.set(0.055, 0.055, 0.055);
    this.add(this.woodenCave);
All the RunningScene.ts file should be looking like this at the moment:
import { Scene, DirectionalLight, AmbientLight, Object3D, } from 'three';

import { FBXLoader } from 'three/examples/jsm/loaders/FBXLoader';

export default class RunningScene extends Scene { private fbxLoader = new FBXLoader();

private woodenCave = new Object3D();

async load() { const ambient = new AmbientLight(0xFFFFFF, 2.5); this.add(ambient);

const light = new DirectionalLight(0xFFFFFF, 2.5);

light.position.set(0, 40, -10); this.add(light);

this.woodenCave = await this.fbxLoader.loadAsync('./assets/models/wooden-cave.fbx'); this.woodenCave.position.set(0, 0, -500); this.woodenCave.scale.set(0.055, 0.055, 0.055); this.add(this.woodenCave); }

initialize() {

}

update() {

}

hide() {

} }
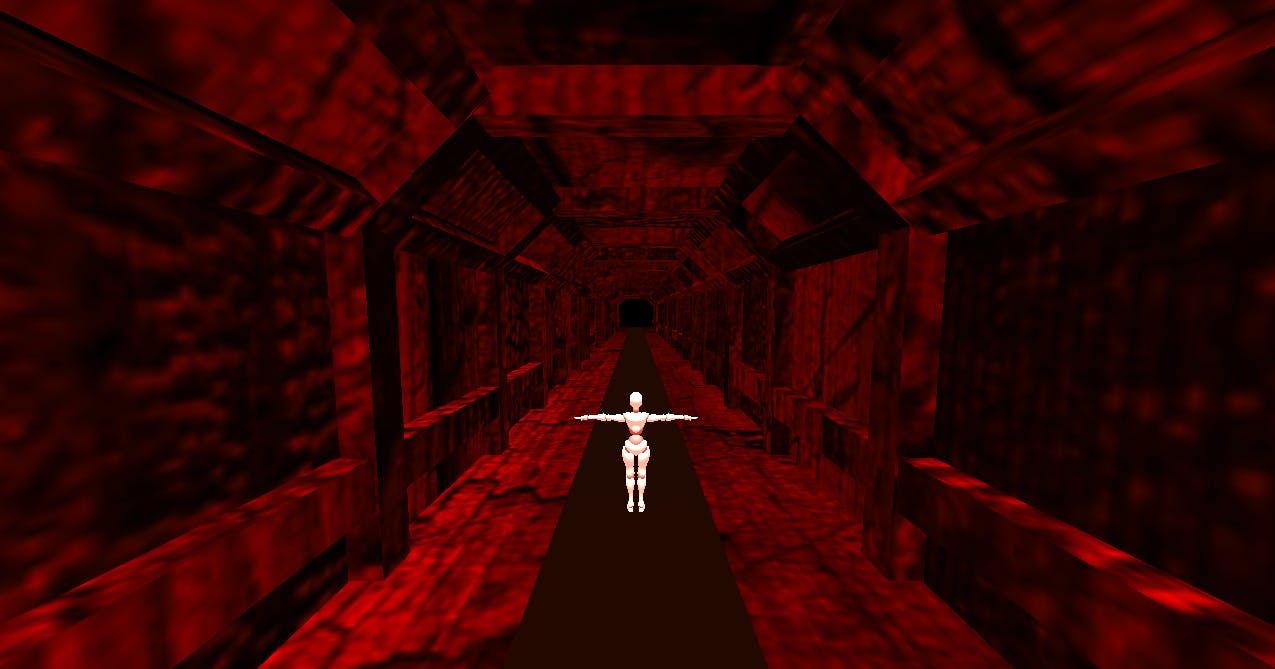
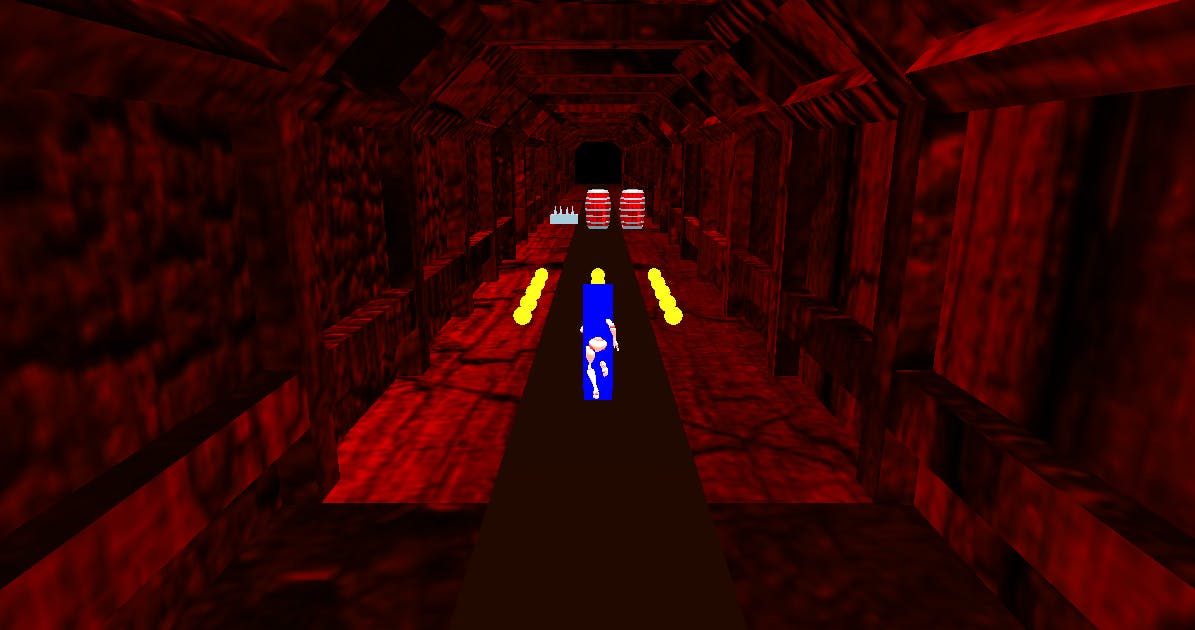
Let's run npm run dev on the CLI and navigate to http://localhost:3000/ in the browser. If everything goes well, we should have an output that looks similar to this:
Making the Player Run
To make the player run, we need three objects from Threejs: AnimationMixer, AnimationAction, and Clock.
The Animation Mixer
The Animation Mixer allows us to play different types of animations on a particular object (this.player in this case ) in a scene.
The Animation Action
The animation action allows us to connect an animation clip to our this.player object and control it by using different methods such as: Play, reset, stop, etc.
The Clock
The Clock object is used for keeping track of time in our game world. Imagine having the power of time in the real world, you can slow down the day, fast forward it, or might even go back in time to fix some things you messed up. Yeah, Threejs can give us such power but unfortunately, we can only use it in our game world, not real in life.
Basically, anytime we need to pause the game, or when the game is over and we need to freeze everything in the scene, we use the Clock object.
import {
  Scene, DirectionalLight, AmbientLight, Object3D, AnimationMixer, AnimationAction, Clock,
} from 'three';
Next, we will create four new private properties called animationMixer, runningAnimation, clock, and delta.
  private animationMixer!: AnimationMixer;

  private runningAnimation!: AnimationAction;

  private clock = new Clock();

  private delta = 0;
The exclamation mark in front of some of the properties is called Definite Assignment Assertion. The feature is used to tell TypeScript that we are very much aware that the property is undefined for now and there is absolutely no reason to complain about it since we are still going to initialize it later in our code.
Let's import the running animation object from the asset folder and play it on the player
 const runningAnimationObject = await   this.fbxLoader.loadAsync('./assets/animations/xbot@running.fbx');

    this.animationMixer = new AnimationMixer(this.player);
    this.runningAnimation = this.animationMixer.clipAction(runningAnimationObject.animations[0]);
    this.runningAnimation.play();
Finally, in the update method, let's add the following code:
  update() {
    if (this.animationMixer) {
      this.delta = this.clock.getDelta();
      this.animationMixer.update(this.delta);
    }
  }
Spawning the Wooden Cave endlessly
We will repeatedly spawn the wooden cave to create the illusion of the player moving forward. We will make the cave two by cloning the first wooden cave(this.woodenCave) into this.woodenCaveClone by using the .clone(); method. Then we will place the this.woodenCaveClone directly behind this.woodenCave. The idea here is to move both caves at once, and once the first cave is out of view from the camera, we will move and reposition it at the back of the second one. We will also repeat this process for the second cave, continuing until the game is over or paused. This way, we will never run out of a cave to spawn.
Let's create three new private properties called woodenCaveClone, caveSize , and speed :
private woodenCaveClone = new Object3D();
private caveSize = 0;
private speed = 220
The woodenCaveClone property will be used to store a copy of the original wooden cave, while the caveSize will be used to store the size of the cave and the speed will be used to store the rate at which se want the cave to be moved. Let's import Box3 from threejs first:
import { Scene, DirectionalLight, AmbientLight, Object3D, AnimationMixer, AnimationAction, Clock, Box3, } from 'three';
The Box3 object will be used for various purposes in this game, including obtaining the size of the wooden cave. We need the size to correctly position the woodenCaveClone directly behind the woodenCave by adding the position of the woodenCave on the z-axis to the size of the cave.
In the load method, let's clone the cave and position it at the back of the original cave:
    this.woodenCaveClone = this.woodenCave.clone();
    const caveBox = new Box3().setFromObject(this.woodenCave);
    this.caveSize = caveBox.max.z - caveBox.min.z - 1;
    this.woodenCaveClone.position.z = this.woodenCave.position.z + this.caveSize;
    this.add(this.woodenCaveClone);
We used const caveBox = new Box3().setFromObject(this.woodenCave) to set an invisible box around the cave and this.caveSize = caveBox.max.z - caveBox.min.z - 1; to get the size of the cave. I subtracted 1 from the size (caveBox.max.z - caveBox.min.z) to close the little (almost unnoticeable) gap between the two caves. You can remove it if you want.
Now that we have two wooden caves in our Running Scene, it's time to start moving them toward the player and the camera. Let's add the following code to our update method
    this.woodenCave.position.z += this.speed * this.delta;
    this.woodenCaveClone.position.z += this.speed * this.delta;
If we refresh the browser now, we will see that the caves are moving towards the player, giving the appearance of the player running forward. However, once the caves move past the player, they do not return and it appears as though the player is running through an empty, dark space."
To fix that, we will re-spawn the caves when they are no longer visible to the camera.
Let's add the following code to our load method, below the previous statement.
    if (this.woodenCave.position.z > 600) {
      this.woodenCave.position.z = this.woodenCaveClone.position.z - this.caveSize;
    }

    if (this.woodenCaveClone.position.z > 600) {
      this.woodenCaveClone.position.z = this.woodenCave.position.z - this.caveSize;
    }
Now when the woodenCave is out of view , we will reposition it directly behind the woodenCaveClone, and when the woodenCaveClone is out of view too, we will reposition it directly behind the woodenCave. This way we will never run out of cave to spawn.
Moving the Player left and right
I'll be using Tweenjs for an easy, smooth transition of the player from one position to another. Tweenjs came prebundled with threejs but it has no typings. Since we're using TypeScript for this project, we need to install it separately by running the following command:
npm i @tweenjs/tween.js
After installing it, we will import it into our running scene:
import TWEEN, { Tween } from '@tweenjs/tween.js';
Next, we will create a new private method called moveLeft(). This method will move the player from its current position to the left.
  private moveLeft() {
    if (this.player.position.x !== -18) {
      const tweenLeft = new TWEEN.Tween(this.player.position)
        .to({ x: this.player.position.x - 18 }, 200)
        .easing(TWEEN.Easing.Quadratic.Out)
        .onUpdate(() => {
          this.player.rotation.y = -140 * (Math.PI / 180);
          if (this.player.position.x <= -18) {
            this.player.position.x = -18;
          }
        })
        .onComplete(() => {
          this.player.rotation.y = 180 * (Math.PI / 180);
        });
      tweenLeft.start();
    }
  }
This conditional statement: if (this.player.position.x !== -18) { constrain the player from moving out of the cave. This part .to({ x: this.player.position.x - 18 }, 200) moves the player to the left in 0.2 second. This easing function .easing(TWEEN.Easing.Quadratic.Out) is used to determine how the jumping animation curve will go. This particular one(TWEEN.Easing.Quadratic.Out) will start the player's movement quickly towards the value but then slow down as it approaches the final value. This part: javascript .onUpdate(() => { this.player.rotation.y = -140 * (Math.PI / 180); if (this.player.position.x <= -18) { this.player.position.x = -18; } }) Rotates the player a little bit to the left, so it looks like the player is crossing to the left lane while the tween animation is being updated.
After the tween has moved the player to it final value, I reset the player's rotation back to its initial position:
.onComplete(() => {
          this.player.rotation.y = 180 * (Math.PI / 180);
        });
I used tweenLeft.start(); to start the player movement to the left.
Now that we are done with the moveLeft() method, we will createmoveRight() method. The moveRight() method is almost the same as the moveLeft() method. We'll only change some values to ensure the player is going right instead of left.
  private moveRight() {
    if (this.player.position.x !== 18) {
      this.player.rotation.y = 140 * (Math.PI / 180);
      const tweenRight = new Tween(this.player.position)
        .to({ x: this.player.position.x + 18 }, 200)
        .easing(TWEEN.Easing.Quadratic.Out)
        .onUpdate(() => {
          if (this.player.position.x >= 18) {
            this.player.position.x = 18;
          }
        })
        .onComplete(() => {
          this.player.rotation.y = 180 * (Math.PI / 180);
        });
      tweenRight.start();
    }
  }
Finally, inside update() method:
TWEEN.update();
Without the TWEEN.update(); method, the player will not move.
Next, we will call the moveLeft method anytime the player presses the arrow-left button and moveRight method anytime the player presses the arrow-rightbutton on their keyboard. Let's add the follow code to the initialize method:
    document.onkeydown = (e) => {
      if (e.key === 'ArrowLeft') {
        this.moveLeft();
      } if (e.key === 'ArrowRight') {
        this.moveRight();
      }
    };
Making The Player Jump
Just like we used Tween to move the player in the moveLeft() and moveRight() method, we'll be using it to perform the player's jump movement. But this time, we'll move the player on the y-axis instead of the x-axis.
  private currentAnimation!: AnimationAction;

  private jumpingAnimation!: AnimationAction;

  private isJumping = false;

  private jumpingUp!: Tween<any>;

  private jumpingDown!: Tween<any>;
We declared five private properties: The current animation, jumpingAnimation, isJumping , jumpingUp, and jumpingDown. Here's what we are going to be doing with the them:
The currentAnimation variable will store the animation that is currently being played. This is necessary because we must stop the current animation before playing a new one on the player. Before proceeding, let's set the running animation as the current animation in the load method:
this.currentAnimation = this.runningAnimation;
The jumpingAnimation property will be used to store the jumping animation clip.
The isJumping boolean will be set when the player jumps. This is to prevent multiple jumps. When the player jumps, we set the value to true, and once they have finished jumping, we set it back to false. Therefore, before calling the jump() method, we will check if isJumping is false before allowing the player to jump.
Finally, we will perform two tween animations, one that takes the player up and another that brings it down. The jumpingUp property will be used to make the player jump up, while the jumpingDown will bring the player back to the ground. I'll be using the .chain method to join both animations. So when the jumpingUp has finished playing, the jumpingDown will start immediately. The jumping animation we will import right now will play as we use the tween to move the player up and down.
Let's add the following code to the load method.
    const jumpingAnimationObject = await this.fbxLoader.loadAsync('./assets/animations/xbot@jumping.fbx');

 this.jumpingAnimation = this.animationMixer.clipAction(jumpingAnimationObject.animations[0]);
After that, we will create the jump() method:
  private jump() {
    if (!this.isJumping) {
      this.isJumping = true;
      this.currentAnimation.stop();

      this.currentAnimation = this.jumpingAnimation;
      this.currentAnimation.reset();
      this.currentAnimation.setLoop(1, 1);
      this.currentAnimation.clampWhenFinished = true;
      this.currentAnimation.play();
      this.animationMixer.addEventListener('finished', () => {
        this.currentAnimation.crossFadeTo(this.runningAnimation, 0.1, false).play();
        this.currentAnimation = this.runningAnimation;
      });

      this.jumpingUp = new Tween(this.player.position).to({ y: this.player.position.y += 20 }, 400);
      this.jumpingDown = new Tween(this.player.position)
        .to({ y: this.player.position.y -= 20 }, 500);
      this.jumpingUp.chain(this.jumpingDown);
      this.jumpingUp.start();
      this.jumpingDown.onComplete(() => {
        this.isJumping = false;
        this.player.position.y = -35;
      });
    }
  }
This part this.currentAnimation.reset(); resets the animation. Not reseting the animations after playing it could make the animation act up while playing. I used this.currentAnimation.setLoop(1, 1); to set the jumping animation to play only once. By default, the animation plays till infinity, that is why the player never stops running when we played the running animation on it. this.currentAnimation.clampWhenFinished = true; means the animation should pause on the last frame, instead of going back to the default t-pose.
this.animationMixer.addEventListener('finished', () => {
        this.currentAnimation.crossFadeTo(this.runningAnimation, 0.1, false).play();
        this.currentAnimation = this.runningAnimation;
      });
I used the code above to make a smooth transition back to the running animation immediately the jumping animation has finished playing.
Next, we will call the jump() method anytime the user presses the arrow-up key on the keyboard. We will add touch support for touch screen devices later in this tutorial.
    document.onkeydown = (e) => {
      if (e.key === 'ArrowLeft') {
        this.moveLeft();
      } if (e.key === 'ArrowRight') {
        this.moveRight();
      }
      if (e.key === 'ArrowUp') {
        this.jump();
      }
    };
Making The Player Slide
To make the player slide, we will need to create three private properties: isSliding, slidingAnimation, and sliderTimeout. These will be used in the implementation of the sliding feature.
  private isSliding = false;

  private slidingAnimation !: AnimationAction;

  private sliderTimeout!: ReturnType<typeof setTimeout>;
We will use the isSliding boolean value in a similar way as we did with isJumping in the jump() method. We will set isSliding to true when the player starts sliding and set it back to false when the sliding ends. This will prevent the player from initiating multiple slides at the same time. The isSliding boolean will also be checked by the jump() method to stop the sliding animation before playing the jumping animation.
The slidingAnimation property will be used to store the sliding animation action, while the sliderTimeout property will be used to store the slider setTimeout id. I made the sliderTimeout global so that I can cancel the slidingAnimation from the jump() method whenever the player decides to jump while sliding (we will update the jump method very soon).
Let's add the following code the the load method
const slidingAnimationObject = await this.fbxLoader.loadAsync('./assets/animations/xbot@sliding.fbx'); // remove the animation track that makes the player move forward when sliding slidingAnimationObject.animations[0].tracks.shift();
this.slidingAnimation = this.animationMixer.clipAction(slidingAnimationObject.animations[0]);
If you can remember when we are downloading the sliding animation on Mixamo's website in the previous article, the animation doesn't stay in place and it has no option to enforce it before downloading it. so to prevent the player from moving forward when sliding, we used this code to remove the track slidingAnimationObject.animations[0].tracks.shift();.
Now we can create the sliding method:
private slide() {
  if (!this.isSliding) {
    if (this.isJumping) {
      this.jumpingUp.stop();
      this.jumpingDown.stop();
      this.player.position.y = -35;
      this.isJumping = false;
    }
    this.isSliding = true;
    this.player.position.y -= 5;
    this.currentAnimation.stop();
    this.slidingAnimation.reset();
    this.currentAnimation = this.slidingAnimation;
    this.slidingAnimation.clampWhenFinished = true;
    this.slidingAnimation.play();
    this.slidingAnimation.crossFadeTo(this.runningAnimation, 1.9, false).play();
    this.currentAnimation = this.runningAnimation;
    this.sliderTimeout = setTimeout(() => {
      this.player.position.y = -35;
      this.isSliding = false;
    }, 800);
  }
}
Here's how the slide() method functions: first, it verifies that the player is not already sliding. If not, it cancels the jumping animation. Next, the method lowers the player slightly by subtracting 5 from their y-axis position for 0.8 seconds. During this time, the animation changes from the current animation to the sliding animation, and then back to the running animation after 1.2 seconds. The reason for decreasing the player's y-axis position by 5 while sliding is to prevent them from colliding with sliding obstacles (which will be implemented later in the tutorial).
Next, we will make the player slide whenever the arrow-down button is pressed.
    document.onkeydown = (e) => {
      if (e.key === 'ArrowLeft') {
        this.moveLeft();
      } if (e.key === 'ArrowRight') {
        this.moveRight();
      }
      if (e.key === 'ArrowUp') {
        this.jump();
      }
      if (e.key === 'ArrowDown') {
        this.slide();
      }
    };
Now let's update the jump method to cancel the sliding animation if the player was sliding before before switching to jumping animation.
      private jump() {
    if (!this.isJumping) {
      if (this.isSliding) {
        clearTimeout(this.sliderTimeout);
        this.player.position.y = -35;
        this.isSliding = false;
      }
      this.isJumping = true;
      this.currentAnimation.stop();

      this.currentAnimation = this.jumpingAnimation;
      this.currentAnimation.reset();
      this.currentAnimation.setLoop(1, 1);
      this.currentAnimation.clampWhenFinished = true;
      this.currentAnimation.play();
      this.animationMixer.addEventListener('finished', () => {
        this.currentAnimation.crossFadeTo(this.runningAnimation, 0.1, false).play();
        this.currentAnimation = this.runningAnimation;
      });

      this.jumpingUp = new Tween(this.player.position).to({ y: this.player.position.y += 20 }, 400);
      this.jumpingDown = new Tween(this.player.position)
        .to({ y: this.player.position.y -= 20 }, 500);
      this.jumpingUp.chain(this.jumpingDown);
      this.jumpingUp.start();
      this.jumpingDown.onComplete(() => {
        this.isJumping = false;
        this.player.position.y = -35;
      });
    }
  }
Creating Obstacles
We will be creating various obstacles that move towards the player. Some of these obstacles will require the player to change direction by swerving left or right, while others will require the player to slide or jump.
To get started, let's create four new private properties: barrelObject , boxObject , spikeObject, and obstacleArray
import {
  Scene, DirectionalLight, AmbientLight, Object3D, AnimationMixer, AnimationAction, Clock,
  Box3, Group,
} from 'three';
  private barrelObject = new Object3D();

  private boxObject = new Object3D();

  private spikeObject = new Object3D();

  private obstacleArray: Group[] = [];
The barrelObject property will be used to store the imported barrel model, the boxObject property will be used to store the box model, and the spikeObject property will be used to store the spike model. The obstacleArray property will be used to store a group of these obstacles.
Let's import the obstacle models into the load() method.:
    this.barrelObject = await this.fbxLoader.loadAsync('../../assets/models/barrel.fbx');
    this.boxObject = await this.fbxLoader.loadAsync('../../assets/models/box.fbx');
    this.spikeObject = await this.fbxLoader.loadAsync('../../assets/models/spike.fbx');
We will now create a new private method called createLeftJumpObstacle(). This method will generate a group of obstacles that will require the player to move to the left and jump in order to avoid collision.
  private createLeftJumpObstacle() {
    const meshGroup = new Group();
    const mesh = this.barrelObject.clone();
    mesh.scale.set(0.03, 0.03, 0.03);
    mesh.position.set(0, -25, 0);
    meshGroup.add(mesh);
    const mesh2 = this.barrelObject.clone();
    mesh2.scale.set(0.03, 0.03, 0.03);
    mesh2.position.set(20, -25, 0);
    meshGroup.add(mesh2);
    const mesh3 = this.spikeObject.clone();
    mesh3.scale.set(0.06, 0.06, 0.06);
    mesh3.position.set(-20, -31, 0);
    meshGroup.add(mesh3);
    meshGroup.position.set(0, 0, -800);
    this.add(meshGroup);
    meshGroup.visible = true;
    this.obstacleArray.push(meshGroup);
  }
First, we created a meshGroup object that will be used to group the createLeftJumpObstacle together. Then we cloned and scaled some of the obstacles we imported earlier into mesh, mesh2, and mesh3, respectively. We placed the two barrels side by side by setting their positions and placed the spike object on the left side, then we added them to the meshGroup . We moved the meshGroup a little bit far from the player position and added it to the scene. We temporarily set the meshGroup visible so that we can see what we built. We will make it invisible by default and only make it visible when they are active and being spawned towards the player. Once the player could dodge the obstacle and is no longer visible to the camera, we'll make it invisible again and reset its position.
Let's call the obstacle method inside the load() method like this:
this.createLeftJumpObstacle();
Generating More Obstacles
Just like we created the createLeftJumpObstacle(), we are going to create more obstacles but before we do that, let's make createLeftJumpObstacle() invisible:
meshGroup.visible = false;
Center Jump Obstacle
This will create a group of obstacles that will force the player to move to the middle lane and jump to avoid collisions with the obstacles. It will create a barrel object at the left and right lane and a spike object at the center.
private createCenterJumpObstacle() {
    const meshGroup = new Group();
    const mesh = this.barrelObject.clone();
    mesh.scale.set(0.03, 0.03, 0.03);
    mesh.position.set(-20, -25, 0);
    meshGroup.add(mesh);
    const mesh2 = this.barrelObject.clone();
    mesh2.scale.set(0.03, 0.03, 0.03);
    mesh2.position.set(20, -25, 0);
    meshGroup.add(mesh2);
    const mesh3 = this.spikeObject.clone();
    mesh3.scale.set(0.06, 0.06, 0.06);
    mesh3.position.set(0, -31, 0);
    meshGroup.add(mesh3);
    meshGroup.position.set(0, 0, -1200);
    this.add(meshGroup);
    meshGroup.visible = false;
    this.obstacleArray.push(meshGroup);
  }
Right Jump Obstacle
This will generate a group of obstacles that will force the player to move to the right lane and jump to avoid collision with the obstacles. It will create a barrel object on the left and middle lanes and a spike object on the right lane.
private createRightJumpObstacle() {
const meshGroup = new Group();
const mesh = this.barrelObject.clone();
mesh.scale.set(0.03, 0.03, 0.03);
mesh.position.set(-20, -25, 0);
meshGroup.add(mesh);

const mesh2 = this.barrelObject.clone();
mesh2.scale.set(0.03, 0.03, 0.03);
mesh2.position.set(0, -25, 0);
meshGroup.add(mesh2);

const mesh3 = this.spikeObject.clone();
mesh3.scale.set(0.06, 0.06, 0.06);
mesh3.position.set(20, -31, 0);
meshGroup.add(mesh3);

meshGroup.position.set(0, 0, -1200);
this.add(meshGroup);
meshGroup.visible = false;
this.obstacleArray.push(meshGroup);
}
Right Center Obstacle
This will generate a group of obstacles that will force the player to switch to the left lane to avoid collision with the obstacles. It will create a barrel object on the right lane and middle lane
  private createRightCenterObstacle() {
    const meshGroup = new Group();
    const mesh = this.barrelObject.clone();
    mesh.scale.set(0.03, 0.03, 0.03);
    mesh.position.set(0, -25, 0);
    meshGroup.add(mesh);
    const mesh2 = this.barrelObject.clone();
    mesh2.scale.set(0.03, 0.03, 0.03);
    mesh2.position.set(20, -25, 0);
    meshGroup.add(mesh2);
    meshGroup.position.set(0, 0, -1200);
    this.add(meshGroup);
    meshGroup.visible = false;
    this.obstacleArray.push(meshGroup);
  }
Left Center Obstacle
This will generate a group of obstacles that will force the player to switch to the right lane to avoid collision with the obstacles. It will create a barrel object on the left lane and middle lane
  private createLeftCenterObstacle() {
    const meshGroup = new Group();
    const mesh = this.barrelObject.clone();
    mesh.scale.set(0.03, 0.03, 0.03);
    mesh.position.set(-20, -25, 0);
    meshGroup.add(mesh);
    const mesh2 = this.barrelObject.clone();
    mesh2.scale.set(0.03, 0.03, 0.03);
    mesh2.position.set(0, -25, 0);
    meshGroup.add(mesh2);
    meshGroup.position.set(0, 0, -1200);
    this.add(meshGroup);
    meshGroup.visible = false;
    this.obstacleArray.push(meshGroup);
  }
Left Right Obstacle
This will generate a group of obstacles that will force the player to switch to the middle lane to avoid collision with the obstacles. It will create a barrel object on the left lane and right lane
  private createLeftRightObstacle() {
    const meshGroup = new Group();
    const mesh = this.barrelObject.clone();
    mesh.scale.set(0.03, 0.03, 0.03);
    mesh.position.set(-20, -25, 0);
    meshGroup.add(mesh);
    const mesh2 = this.barrelObject.clone();
    mesh2.scale.set(0.03, 0.03, 0.03);
    mesh2.position.set(20, -25, 0);
    meshGroup.add(mesh2);
    meshGroup.position.set(0, 0, -1200);
    this.add(meshGroup);
    meshGroup.visible = false;
    this.obstacleArray.push(meshGroup);
  }
Center Right Obstacle
This will generate a group of obstacles that will force the player to switch to the left lane to avoid collision with the obstacles. It will create a barrel object on the middle and right lanes
  private createCenterRightObstacle() {
    const meshGroup = new Group();
    const mesh = this.barrelObject.clone();
    mesh.scale.set(0.031, 0.031, 0.031);
    mesh.position.set(-20, -25, 0);
    meshGroup.add(mesh);
    const mesh2 = this.barrelObject.clone();
    mesh2.scale.set(0.03, 0.03, 0.03);
    mesh2.position.set(20, -25, 0);
    meshGroup.add(mesh2);
    meshGroup.position.set(0, 0, -1200);
    this.add(meshGroup);
    meshGroup.visible = false;
    this.obstacleArray.push(meshGroup);
  }
Center Slide Obstacle
This will generate a group of obstacles that will force the player to switch to the middle lane and slide to avoid collision with the obstacles. It will create a barrel object on the left and right side of the lane, and a box sitting on a plank that is resting between the two barrels in the middle lane.
import {
  Scene, DirectionalLight, AmbientLight, Object3D, AnimationMixer, AnimationAction, Clock,
  Box3, Group, BoxGeometry, MeshPhongMaterial, Mesh,
} from 'three';
  private createCenterSlideObstacle() {
    const meshGroup = new Group();
    const geometry = new BoxGeometry();
    const material = new MeshPhongMaterial({ color: 'brown' });
    const plank = new Mesh(geometry, material);
    meshGroup.add(plank);
    plank.position.set(0, -20, 0);
    plank.scale.set(40, 0.5, 7);
    const mesh = this.barrelObject.clone();
    mesh.scale.set(0.03, 0.03, 0.03);
    mesh.position.set(-20, -25, 0);
    meshGroup.add(mesh);
    const mesh2 = this.barrelObject.clone();
    mesh2.scale.set(0.03, 0.03, 0.03);
    mesh2.position.set(20, -25, 0);
    meshGroup.add(mesh2);
    const mesh3 = this.boxObject.clone();
    mesh3.scale.set(4, 2, 2);
    mesh3.position.set(0, -19, 3);
    meshGroup.add(mesh3);
    meshGroup.position.set(0, 0, -1200);
    this.add(meshGroup);
    meshGroup.visible = false;
    this.obstacleArray.push(meshGroup);
  }
Right Slide Obstacle
This will generate a group of obstacles that will force the player to switch to the right lane and slide to avoid collision with the obstacles. It will create a barrel object on the left and middle side of the lane, and a box sitting on a plank that is resting between the barrel in the middle lane and right side of the cave.
  private createRightSlideObstacle() {
    const meshGroup = new Group();
    const geometry = new BoxGeometry();
    const material = new MeshPhongMaterial({ color: 'brown' });
    const plank = new Mesh(geometry, material);
    meshGroup.add(plank);
    plank.position.set(20, -20, 0);
    plank.scale.set(40, 0.5, 7);
    const mesh = this.barrelObject.clone();
    mesh.scale.set(0.03, 0.03, 0.03);
    mesh.position.set(-20, -25, 0);
    meshGroup.add(mesh);
    const mesh2 = this.barrelObject.clone();
    mesh2.scale.set(0.03, 0.03, 0.03);
    mesh2.position.set(0, -25, 0);
    meshGroup.add(mesh2);
    const mesh3 = this.boxObject.clone();
    mesh3.scale.set(4, 2, 2);
    mesh3.position.set(20, -19, 3);
    meshGroup.add(mesh3);
    meshGroup.position.set(0, 0, -1200);
    this.add(meshGroup);
    meshGroup.visible = false;
    this.obstacleArray.push(meshGroup);
  }
Left Slide Obstacle
This will generate a group of obstacles that will force the player to switch to the left lane and slide to avoid collision with the obstacles. It will create a barrel object on the middle and right side of the lane, and a box sitting on a plank that is resting between the barrel in the middle lane and left side of the cave.
  private createLeftSlideObstacle() {
    const meshGroup = new Group();
    const geometry = new BoxGeometry();
    const material = new MeshPhongMaterial({ color: 'brown' });
    const plank = new Mesh(geometry, material);
    meshGroup.add(plank);
    plank.position.set(-20, -20, 0);
    plank.scale.set(40, 0.5, 7);
    const mesh = this.barrelObject.clone();
    mesh.scale.set(0.03, 0.03, 0.03);
    mesh.position.set(20, -25, 0);
    meshGroup.add(mesh);
    const mesh2 = this.barrelObject.clone();
    mesh2.scale.set(0.03, 0.03, 0.03);
    mesh2.position.set(0, -25, 0);
    meshGroup.add(mesh2);
    const mesh3 = this.boxObject.clone();
    mesh3.scale.set(4, 2, 2);
    mesh3.position.set(-20, -19, 3);
    meshGroup.add(mesh3);
    meshGroup.position.set(0, 0, -1200);
    this.add(meshGroup);
    meshGroup.visible = false;
    this.obstacleArray.push(meshGroup);
  }
Now that we are don building the obstacles that we need, we need to call them once while the game is loading to generate them. To do that, we are going to call all of them in the load() method:
    this.createLeftJumpObstacle();

    this.createCenterJumpObstacle();

    this.createRightJumpObstacle();

    this.createRightCenterObstacle();

    this.createLeftSlideObstacle();

    this.createCenterRightObstacle();

    this.createLeftCenterObstacle();

    this.createLeftRightObstacle();

    this.createCenterSlideObstacle();

    this.createRightSlideObstacle();
Once we call each one of them, they will generate the obstacles, hide them and push them into the obstacleArray
Moving the Obstacles Towards the Player
In this part, we will randomly select two obstacles from the obstacleArray and spawn them towards the player. Let's create two new properties for the obstacles:
  private currentObstacleOne = new Group();

  private currentObstacleTwo = new Group();
Next, we are going to create a method that generate a random obstacle from the list of obstacles that are present in obstacleArray. Also, we are going to make sure that the generated obstacle is not among the obstacles that are currently being spawned by checking if the generated obstacle is currentObstacleOne and currentObstacleTwo first. If it is, then we will keep generating the obstacles randomly till we find a unique obstacle that is currently not being spawned.
  private createRandomObstacle() {
    let randomNum = Math.floor(Math.random() * this.obstacleArray.length);

    while (this.obstacleArray[randomNum] === this.currentObstacleOne
      || this.obstacleArray[randomNum] === this.currentObstacleTwo) {
      randomNum = Math.floor(Math.random() * this.obstacleArray.length);
    }
    return this.obstacleArray[randomNum];
  }
After that, we will create a new method called: spawnObstacle This method will be responsible for moving the obstacles toward the player. When the obstacles are no longer visible to the camera, it will hide them and restore their positions. Then create another random obstacle by calling the createRandomObstacle method.
private spawnObstacle() {
if (!this.currentObstacleOne.visible) {
this.currentObstacleOne.visible = true;
}

if (!this.currentObstacleTwo.visible) {
this.currentObstacleTwo.visible = true;
this.currentObstacleTwo.position.z = this.currentObstacleOne.position.z - 450;
}

this.currentObstacleOne.position.z += this.speed * this.delta;
this.currentObstacleTwo.position.z += this.speed * this.delta;

if (this.currentObstacleOne.position.z > -40) {
this.currentObstacleOne.visible = false;
this.currentObstacleOne.position.z = -1100;
this.currentObstacleOne = this.createRandomObstacle();
}

if (this.currentObstacleTwo.position.z > -40) {
this.currentObstacleTwo.visible = false;
this.currentObstacleTwo.position.z = this.currentObstacleOne.position.z - 450;
this.currentObstacleTwo = this.createRandomObstacle();
}
}
Let's call the spawnObstacle() inside the update() function like so:
this.spawnObstacle();
Detecting Collisions With The Obstacles
In the previous section, we created obstacles but they currently do not affect the player as they pass through them. In this section, we will create a method to detect collisions between the player and the box.
How The Collision Detection Works
We will detects the collision between the player and the obstacles using axis-aligned bounding boxes (AABB). This process involve wrapping our 3D objects (the obstacles and the players in this case) with an invisible box and checking the positions of these boxes to determine whether or not the two boxes overlap. Once they overlap, that means the two objects have collided. As a matter of fact, we have used the bounding box before in this tutorial not as collision detection, but to determine the size of the wooden cave.
We will not be wrapping the box directly around the player, I actually did at first but it took the default shape of the player(T Pose animation) even when the player switch to running animation. This makes the box wider on the x-axis, thereby making the player to collide with objects that are not touching it.
To fix that, we'll be creating a new box geometry just like the cube we created in the previous chapter called playerBox , then wrap it around the player. The box will be in the same position as the player. When the player moves, the cube moves with it. So we'll be detecting the collisions between the playerBox and the obstacles.
Let's create four new objects called: playerBox, playerBoxCollider , obstacleBox , and obstacleBox2 :
import {
  Scene, DirectionalLight, AmbientLight, Object3D, AnimationMixer, AnimationAction, Clock,
  Box3, Group, BoxGeometry, MeshPhongMaterial, Mesh, Vector3,
} from 'three';
  private playerBox = new Mesh(new BoxGeometry(), new MeshPhongMaterial({ color: 0x0000ff }));

  private playerBoxCollider = new Box3(new Vector3(), new Vector3());

  private obstacleBox = new Box3(new Vector3(), new Vector3());

  private obstacleBox2 = new Box3(new Vector3(), new Vector3());
Like I explained earlier, the playerBox will be wrapped around the player above, the playerBoxCollider will be used to create ** axis-aligned bounding boxes (AABB) ** around the playerBox while the obstacleBox and obstacleBox2 will be used to create **AABB ** around currentObstacleOne and currentObstacleTwo respectively.
As previously mentioned, the playerBox will be placed around the player, while the playerBoxCollider will be used to create axis-aligned bounding boxes (AABBs) around the playerBox. Similarly, the obstacleBox and obstacleBox2 will be used to create AABBs around currentObstacleOne and currentObstacleTwo, respectively.
Now, let's wrap the playerBox around the player in the load method:
this.playerBox.scale.set(50, 200, 20); this.playerBox.position.set(0, 90, 0); this.player.add(this.playerBox);
Inside the update method, let's create a bounding box around the playerBox
this.playerBoxCollider.setFromObject(this.playerBox);
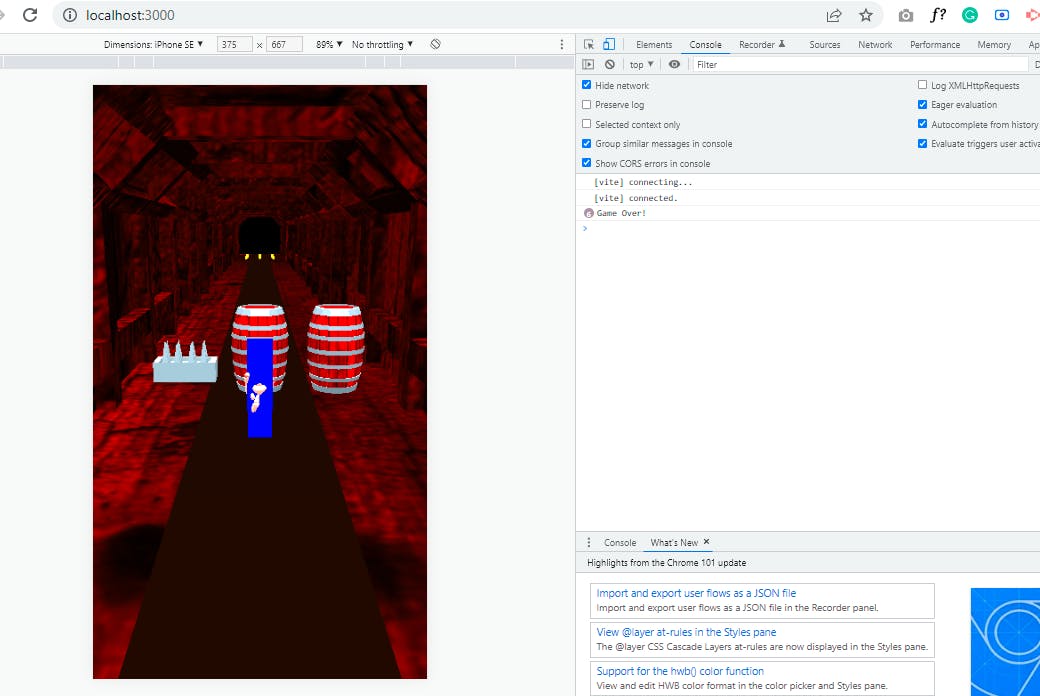
Let's create a new method called gameOver that will be called whenever a collision is detected.
  private gameOver() {
    console.log('game over');
  }
For now, the gameOver method will simply print game over to the console whenever a collision is detected.
Let us create another method called detectCollisionWithObstacles. What this method does is very simple, it will create a bounding box around the currentObstacleOne and currentObstacleTwo children using the .setFromObject method, then check if each of the children is colliding with the playerBoxCollider using the .intersects() method. Once a collision is detected, it will call the gameOver() method.
  private detectCollisionWithObstacles() {
    for (let i = 0; i < this.currentObstacleOne.children.length; i += 1) {
      this.obstacleBox.setFromObject(this.currentObstacleOne.children[i]);
      if (this.playerBoxCollider.intersectsBox(this.obstacleBox)) {
        this.gameOver();
      }
    }
    for (let i = 0; i < this.currentObstacleTwo.children.length; i += 1) {
      this.obstacleBox2.setFromObject(this.currentObstacleTwo.children[i]);

      if (this.playerBoxCollider.intersectsBox(this.obstacleBox2)) {
        this.gameOver();
      }
    }
  }
Let's call the detectCollisionWithObstacles() inside the update method like this:
this.detectCollisionWithObstacles();
Adding the coins
To add coins to the game, we will create two private objects called: coinObject and coinsArray. The coinObject will be used to store the imported coin, while the coinsArray will be used to store a group of coins that will be spawned towards the user.
private coinObject = new Object3D();

private coinsArray: Group[] = [];
The coin object already exists in the asset files, now let's import it to our game by adding the following code to the load method
this.coinObject = await this.fbxLoader.loadAsync('../../assets/models/coin.fbx');
    this.coinObject.rotation.set(90 * (Math.PI / 180), 0, 150 * (Math.PI / 180));
We imported the coin, made it stand straight by rotating it on the z-axis, then turned it to the left a little bit by rotating it on the x-axis. Just as we've created many methods that previously generated different types of obstacles, we will generate different coins and then randomly spawn them towards the player.
Generating left, center, and right lane coins
Let's create a new method and name it: generateLeftCenterRightCoins.
This method will spawn five coins on the left lane, middle lane, and right lane.
  private generateLeftCenterRightCoins() {
    const coinsGroup = new Group();
    for (let i = 0; i < 5; i += 1) {
      const leftCoin = this.coinObject.clone();
      const centerCoin = this.coinObject.clone();
      const rightCoin = this.coinObject.clone();
      leftCoin.position.set(-18, -12, -i * 20);
      centerCoin.position.set(0, -12, -i * 20);
      rightCoin.position.set(18, -12, -i * 20);
      leftCoin.scale.set(0.035, 0.035, 0.035);
      centerCoin.scale.set(0.035, 0.035, 0.035);
      rightCoin.scale.set(0.035, 0.035, 0.035);
      coinsGroup.add(leftCoin, centerCoin, rightCoin);
    }
  coinsGroup.position.set(0, -20, -1200);
    this.add(coinsGroup);
    coinsGroup.visible = false;
    this.coinsArray.push(coinsGroup);
  }
Generating Left Lane Coins
Let's create a new method and name it: generateLeftSideCoin. This method will spawn five coins on the left lane only.
 private generateLeftSideCoin() {
    const coinsGroup = new Group();
    for (let i = 0; i < 5; i += 1) {
      const leftCoin = this.coinObject.clone();
      leftCoin.position.set(-18, -12, -i * 20);
      leftCoin.scale.set(0.035, 0.035, 0.035);
      coinsGroup.add(leftCoin);
    }
    coinsGroup.position.set(0, -20, -1200);
    this.add(coinsGroup);
    coinsGroup.visible = false;
    this.coinsArray.push(coinsGroup);
  }
Generating Left and Middle Lane Coins
Let's create a new method and name it: generateLeftSideCoin. This method will spawn five coins on the left and middle lanes.
  private generateLeftandCenterCoins() {
    const coinsGroup = new Group();
    for (let i = 0; i < 5; i += 1) {
      const leftCoin = this.coinObject.clone();
      const centerCoin = this.coinObject.clone();
      leftCoin.position.set(-18, -12, -i * 20);
      centerCoin.position.set(0, -12, -i * 20);
      leftCoin.scale.set(0.035, 0.035, 0.035);
      centerCoin.scale.set(0.035, 0.035, 0.035);
      coinsGroup.add(leftCoin, centerCoin);
    }
    coinsGroup.position.set(0, -20, -1200);
    this.add(coinsGroup);
    coinsGroup.visible = false;
    this.coinsArray.push(coinsGroup);
  }
Generating Middle and Right Lane Coins
Let's create a new method and name it: generateCenterRightCoins. This method will spawn five coins on the middle and right lanes.
  private generateCenterRightCoins() {
    const coinsGroup = new Group();
    for (let i = 0; i < 5; i += 1) {
      const centerCoin = this.coinObject.clone();
      const rightCoin = this.coinObject.clone();
      centerCoin.position.set(0, -12, -i * 20);
      rightCoin.position.set(18, -12, -i * 20);
      coinsGroup.add(centerCoin, rightCoin);
      centerCoin.scale.set(0.035, 0.035, 0.035);
      rightCoin.scale.set(0.035, 0.035, 0.035);
    }
    coinsGroup.position.set(0, -20, -1200);
    this.add(coinsGroup);
    coinsGroup.visible = false;
    this.coinsArray.push(coinsGroup);
  }
Generating Right Lane Coins
Let's create a new method and name it: generateRightCoins. This method will spawn five coins on the right lane only.
  private generateRightCoins() {
    const coinsGroup = new Group();
    for (let i = 0; i < 5; i += 1) {
      const rightCoin = this.coinObject.clone();
      rightCoin.position.set(18, -12, -i * 20);
      coinsGroup.add(rightCoin);
      rightCoin.scale.set(0.035, 0.035, 0.035);
    }
    coinsGroup.position.set(0, -20, -1200);
    this.add(coinsGroup);
    coinsGroup.visible = false;
    this.coinsArray.push(coinsGroup);
  }
Finally, let's call all the generated coins once in the load() method:
    this.generateLeftCenterRightCoins();

    this.generateLeftSideCoin();

    this.generateLeftandCenterCoins();

    this.generateCenterRightCoins();

    this.generateRightCoins();
Spawning the Coins Randomly
In this part, we will spawn the coins randomly and endlessly move it towards the player. But before then, let's create a new private property called activeCoinsGroup:
private activeCoinsGroup = new Group();
This property will be used to store the generated random coins.
Next, we will create a new method called generateRandomCoins.
  private generateRandomCoins() {
    const randNum = Math.floor(Math.random() * this.coinsArray.length);
    this.activeCoinsGroup = this.coinsArray[randNum];
  }
Once generateRandomCoins is invoked from spawnCoin(), the method will pick a random coinsGroup from the coinsArray and save it into this.activeCoinsGroup, which is then moved towards the player.
Now let's create the spawnCoin method.
  private spawnCoin() {
    if (!this.activeCoinsGroup.visible) {
      this.activeCoinsGroup.visible = true;
    }

    this.activeCoinsGroup.position.z += 0.8 * this.speed * this.delta;
    if (this.activeCoinsGroup.position.z > 50) {
      for (let i = 0; i < this.activeCoinsGroup.children.length; i += 1) {
        if (!this.activeCoinsGroup.children[i].visible) {
          this.activeCoinsGroup.children[i].visible = true;
        }
      }
      this.activeCoinsGroup.visible = false;
      this.activeCoinsGroup.position.z = -1200;
      this.generateRandomCoins();
    }
  }
This method moves the this.activeCoinsGroup towards the player. Once the active coins have been moved past the player and are no longer visible to the screen, it will hide them, restore their position to default, and generate another random coin then move them towards the player.
Now let's call the spawnCoin from the update method.
this.spawnCoin();
Detecting Collison with Coins
We will detect collisions with the coins the same way we detected the collisions with the obstacles by using AABB algorithm. Let's create a new private object called coinBox:
private coinBox = new Box3(new Vector3(), new Vector3());
Next, we will create a new method called detectCollisionWithCoins. This method will set bounding boxes for each of the activeCoinsGroup's children and store them in coinBox. Then check if playerBoxCollider collides with coinBox using the .intersectsBox() method. If the player collides with the activeCoinsGroup child, it will hide it by setting its visibility false.
  private detectCollisionWithCoins() {
    for (let i = 0; i < this.activeCoinsGroup.children.length; i += 1) {
      this.coinBox.setFromObject(this.activeCoinsGroup.children[i]);
      if (this.playerBoxCollider.intersectsBox(this.coinBox)) {
        this.activeCoinsGroup.children[i].visible = false;
      }
    }
  }
Let's call the method ins the update method:
this.detectCollisionWithCoins();
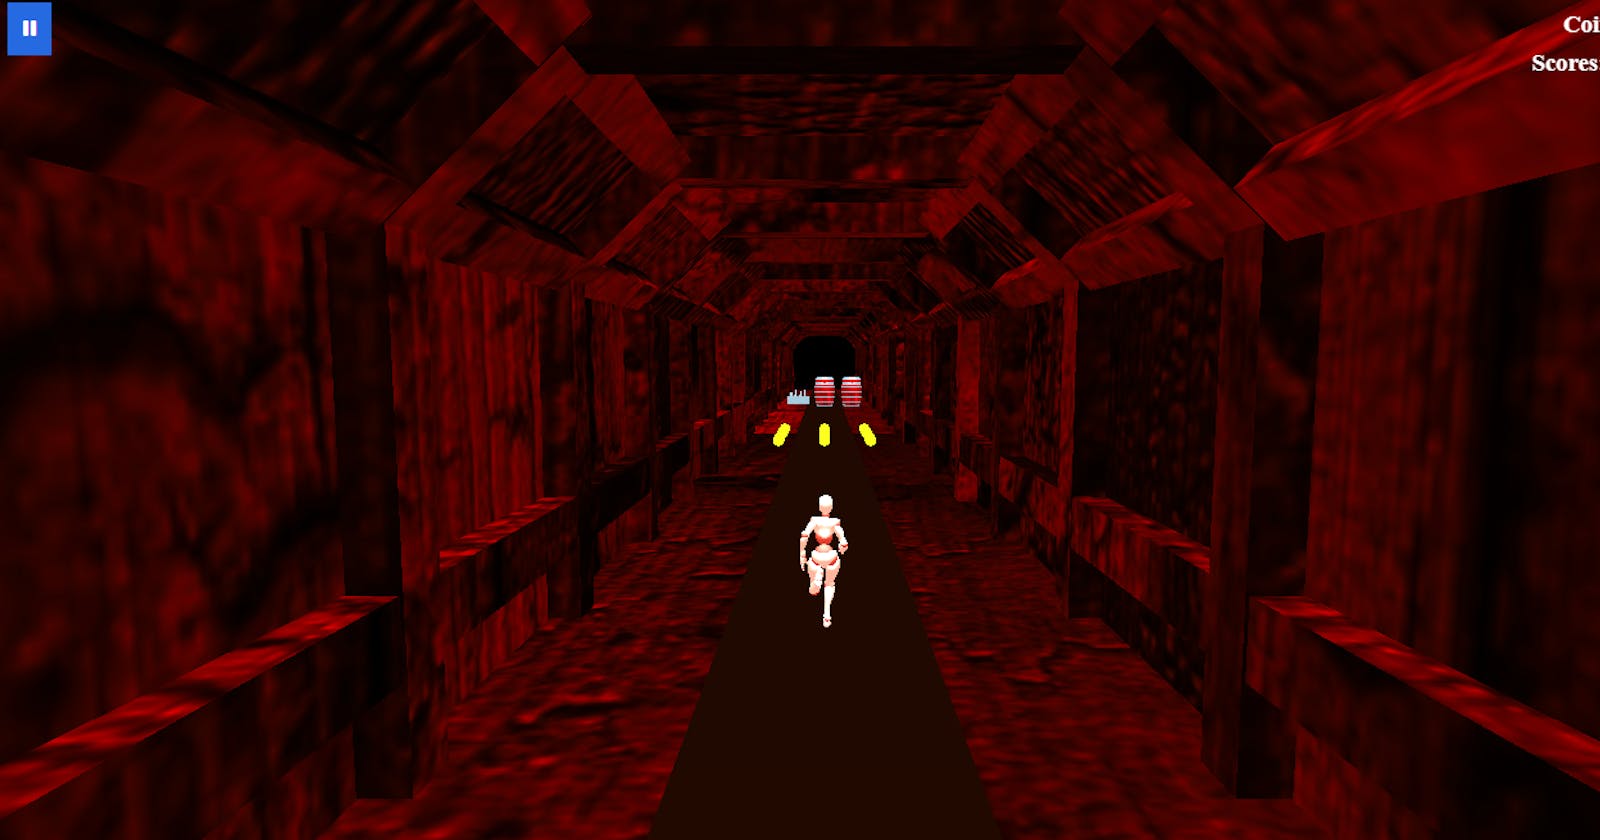
Calculating And Displaying The Scores And Coins
In this part, we are going to compute the scores and the coins and then display them using HTML and CSS. Threejs has tons of ways to display text, you can check them out here. Creating texts with HTML and CSS seems to be the easiest and fastest way. Using this method means we have to use the position: absolute and z-index to position the text elements above the canvas else the text might not show up.
Let's open up our index.html file and update it with the following code: ```html
Coins: 0
Scores: 0
Let's add open up our style.css file and update it:
html, body {
  overflow: hidden;
  margin: 0px;
  height: 100%;
}

#app {
  font-family: Avenir, Helvetica, Arial, sans-serif;
  -webkit-font-smoothing: antialiased;
  -moz-osx-font-smoothing: grayscale;
  text-align: center;
  width: 100%;
  height: 100%;
  display: block;
}

.coins-container,
.scores-container {
    position: absolute;
    top: 0;
    color: white;
    right: 0;
    padding: 0 10px 0 0px;
}

.coins-container {
  margin-top: 30px;
}
.scores-container,
.coins-container {
  display: none;
}
We created the HTML elements that will display the coins and scores texts, then we added some styles to them. Initially, they will be hidden, we will only display them when we start the game.
Back to our runningScene.ts file, let's create two new private properties, scores and coins
  private scores = 0;

  private coins = 0;
We will store the player's score in scores and coins in coins.
Let's update the detectCollisionWithCoins with the following code:
private detectCollisionWithCoins() {
    for (let i = 0; i < this.activeCoinsGroup.children.length; i += 1) {
      this.coinBox.setFromObject(this.activeCoinsGroup.children[i]);
      if (this.playerBoxCollider.intersectsBox(this.coinBox)) {
        this.activeCoinsGroup.children[i].visible = false;
        this.activeCoinsGroup.children[i].position.z += 70;
        this.coins += 1;
        (document.querySelector('.coins-count') as HTMLInputElement).innerHTML = `${this.coins}`;
        setTimeout(() => {
          this.activeCoinsGroup.children[i].position.z -= 70;
        }, 100);
      }
    }
  }
Setting the this.activeCoinsGroup.children[i].visible = false; immediately the player intersects with the coins does not remove the coins, neither does it remove the collider, it just makes it invisible but it's still in the scene. This means that this.coins += 1 will be called from the moment the player intersects with the coins till the end of the intersections. So instead of our coin value getting incremented once per collision, it will be increased more than once, we can get something like five or more depending on how long the intersection took place.
To fix this problem, we can delete the coin from the scene immediately after the player intersects with it and then re-create the coin later. This can turn out to be a very bad idea. When a new object is created, JavaScript automatically allocates memory for it, and when the object got deleted, it frees the allocated memory. Frequently creating and destroying objects is an expensive operation on the CPU and may cause the game to lag.
Instead of having to delete the coins from the scene when the player collides with it, I moved the coins to the back of the player immediately the intersection occur using : this.activeCoinsGroup.children[i].position.z += 70;, then restore it back to it's original position using this.activeCoinsGroup.children[i].position.z -= 70; after 0.1 seconds.
Let's make the scores and coins visible by adding the following code to the initialize method:
    (document.querySelector('.scores-container') as HTMLInputElement).style.display = 'block';

    (document.querySelector('.coins-container') as HTMLInputElement).style.display = 'block';
Add the following to the update method:
this.scores += Math.round(this.speed * this.delta); (document.querySelector('.scores-count') as HTMLInputElement).innerHTML = this.scores.toString();
Implementing Game Pause, Game Over, and Restart
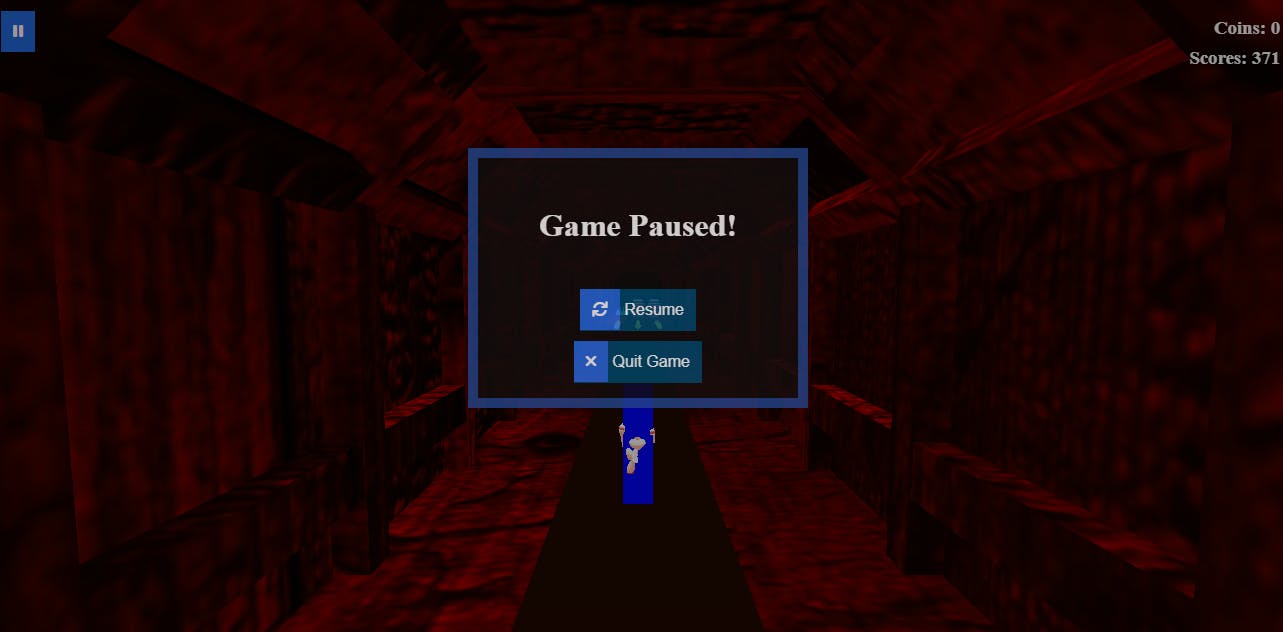
To implement Game Pause, Game Over, and Restart Game features, we need to add some design to our game. For example, when the game is paused there will be a modal that displays "Game Paused" with a resume button on it. When the game is over, we will create another modal that displays: "game Over" with two buttons on it, one to restart the game, and another to quit the game. Let's quickly implement the designs by updating our HTML file with the following:
<!DOCTYPE html>
<html lang="en">

<head>
  <meta charset="UTF-8" />
  <link rel="icon" type="image/svg+xml" href="favicon.svg" />
  <meta name="viewport" content="width=device-width, initial-scale=1.0" />
  <link rel="stylesheet" href="./src/style.css">
  <link rel="stylesheet" href="https://cdnjs.cloudflare.com/ajax/libs/font-awesome/6.0.0/css/all.min.css" />
  <title>Threejs Endless Runner</title>
</head>

<body>
  <div class="coins-container">
    <h3>Coins: <span class="coins-count">0</span></h3>
  </div>
  <div class="scores-container">
    <h3>Scores: <span class="scores-count">0</span></h3>
  </div>

  <div class="pause-button">
    <button class="btn-icon-only">
      <span class="btn-icon"><i class="fa-solid fa-pause"></i></span>
    </button>
  </div>

  <div id="game-paused-modal" class="modal">
    <div class="modal-body" id="">
      <br />
      <h1>Game Paused!</h1>
      <br />
      <button class="btn" id="resume-button">
        <span class="btn-icon"><i class="fa-solid fa-refresh"></i></span>
        Resume
      </button><br />
      <button class="btn" id="quit-button">
        <span class="btn-icon"><i class="fa-solid fa-times"></i></span>
        Quit Game
      </button><br />
    </div>
  </div>


  <div id="game-over-modal" class="modal">
    <div class="modal-body" id="game-over-modal">
      <h1>Game Over</h1>
      <p>Your Scores:<span id="current-score"></span></p>
      <p>Coins:<span id="current-coins"></span></p>
      <button class="btn" id="restart-button">
        <span class="btn-icon"><i class="fa-solid fa-refresh"></i></span>
        Restart
      </button>
      <button class="btn" id="quit-button-two">
        <span class="btn-icon"><i class="fa-solid fa-times"></i></span>
        Quit Game
      </button>
    </div>
  </div>

  <canvas id="app">
  </canvas>

  <script type="module" src="/src/main.ts"></script>
</body>
</html>
html, body {
  overflow: hidden;
  margin: 0px;
  height: 100%;
}

#app {
  font-family: Avenir, Helvetica, Arial, sans-serif;
  -webkit-font-smoothing: antialiased;
  -moz-osx-font-smoothing: grayscale;
  text-align: center;
  width: 100%;
  height: 100%;
  display: block;
}

.coins-container,
.scores-container {
    position: absolute;
    top: 0;
    color: #F2E205;
    right: 0;
    padding: 0px 50px ;
    background-color: #00000063;
    display: none;
}

.coins-container {
  margin-top: 40px;
}

.coins-container h3,
.scores-container h3 {
margin:.5rem;
}
.pause-button {
  position: absolute;
  left: 0;
  top: 0;
  margin: 20px 10px;
  display: none;
}

.modal {
  display: none;
  position: fixed;
  z-index: 1;
  padding-top: 100px;
  left: 0;
  top: 0;
  width: 100%;
  height: 100%;
  overflow: auto;
  background-color: rgba(0, 0, 0, 0.4);
}

.modal-body {
  background-color: #BA4D31;
  margin: 50px auto;
  padding: 10px;
  border: 10px solid #2C0604;
  width: 300px;
  opacity: 0.8;
  color: #2C0604;
}

.btn, .btn-icon-only {
background-color: #2C0604;
border: none;
color: #BA4D31;
padding: 12px 12px 12px 0;
font-size: 16px;
cursor: pointer;
margin: 5px;
}

.btn-icon-only {
  padding: 0px;
  color:#F2E205;

}

.btn-icon {
  background-color: #4e2828;
  padding: 12px;
}

.btn:hover {
  opacity: .9;
}
#game-paused-modal {
  display: none;
  text-align: center;
}


#game-over-modal {
  text-align: center;
}
#game-over-modal h1 {
  font-size: 1.5rem;
  margin: 0;
}
#game-over-modal p {
  font-size: 1.3rem;
  margin: 0.8rem;
}
Implementing The Pause Feature
In this part, we will make the game pause and resume anytime the player presses "space" on their keyboard or clicks on the screen's pause button.
Let's create a private boolean property called isGamePaused . We will set its value anytime the game is paused or resumed. Some functions will depend on the boolean value to work.
private isGamePaused = false;
Let's display the pause button element by adding the following script to the initialize method:
(document.querySelector('.pause-button') as HTMLInputElement).style.display = 'block';
then, we will create a pauseAndResumeGame method:
 private pauseAndResumeGame() {
    if (!this.isGamePaused ) {
      this.clock.stop();
      (document.getElementById('game-paused-modal') as HTMLInputElement).style.display = 'block';
      this.isGamePaused = true;
    } else {
      this.clock.start();
      (document.getElementById('game-paused-modal') as HTMLInputElement).style.display = 'none';
      this.isGamePaused = false;
    }
  }
Anytime the pauseAndResumeGame is invoked, it checks if the game is not paused, if it's not paused, it will pause the game and display the "game-paused-modal", else it will resume the game and hide the "game-paused-modal".
To make the "pause-button" and the "resume-button" call our pauseAndResumeGame method anytime they are pressed, we'll add the following code to the initialize method:
      (document.querySelector('.pause-button') as HTMLInputElement).onclick = () => {
      this.pauseAndResumeGame();
    };

    (document.getElementById('resume-button') as HTMLInputElement).onclick = () => {
      this.pauseAndResumeGame();
    };
Next, we will make the game pause anytime the player press the space-bar button on their keyboard and restrict the player's movement anytime the game is paused:
  document.onkeydown = (e) => {
    if (!this.isGamePaused ) {
      if (e.key === 'ArrowLeft') {
        this.moveLeft();
      } if (e.key === 'ArrowRight') {
        this.moveRight();
      }
      if (e.key === 'ArrowUp') {
        this.jump();
      }
      if (e.key === 'ArrowDown') {
        this.slide();
      }
      if (e.key === ' ') {
        this.pauseAndResumeGame();
      }
    }
  };
Implementing Game Over
Let's create two new private properties: isGameOver and stumbleAnimation
private isGameOver = false;
private stumbleAnimation!: AnimationAction;
We will set the value of isGameOver to true anytime the player collides with the obstacle. Just like isGamePaused object, some functions will depend on its boolean value to work.
Let's import the stumble animation object into the load method:
const stumblingAnimationObject = await this.fbxLoader.loadAsync(
  '../../assets/animations/xbot@stumbling.fbx'
);
this.stumbleAnimation = this.animationMixer.clipAction(
  stumblingAnimationObject.animations[0]
);
We can now update the gameOver method with the following code:
  private gameOver() {
    this.isGameOver = true;
    this.speed = 0;
    (document.querySelector('.pause-button') as HTMLInputElement).style.display = 'none';
    setTimeout(() => {
      this.clock.stop();
      (document.getElementById('game-over-modal') as HTMLInputElement).style.display = 'block';
      (document.querySelector('#current-score') as HTMLInputElement).innerHTML = this.scores.toString();
      (document.querySelector('#current-coins') as HTMLInputElement).innerHTML = this.coins.toString();
      this.stumbleAnimation.reset();
      this.player.visible = false;
    }, 3000);
    this.stumbleAnimation.reset();
    this.currentAnimation.crossFadeTo(this.stumbleAnimation, 0, false).play();
    this.currentAnimation = this.stumbleAnimation;
    this.currentObstacleOne.position.z -= 5;
    this.currentObstacleTwo.position.z -= 5;
  }
Anytime the gameOver method is invoked, it will stop every movement in the game by changing the speed to 0, then plays the stumbling animation, and after 3 seconds it invokes the Clock.Stop() method, the game over modal then appears. Anytime the player collides with the obstacles, the player runs inside it, so I used this.currentObstacleOne.position.z -= 5; and this.currentObstacleTwo.position.z -= 5; to move the obstacle backward a little bit so we can see the player after crashing with the obstacles.
Let's quickly fix a bug in the detectCollisionWithCoins method. Anytime the game is paused when the player stands on a coin, the this.coins value increases continuously. It can also happen when the player stumbles and falls on the coins after colliding with the obstacles. To fix this flaw, we are going to increase the value of the coins only when the game is not paused or when the game is not over by adding this conditional statement to the detectCollisionWithCoins method: if (!this.isGamePaused && !this.isGameOver) {} so everything will like this:
private detectCollisionWithCoins() {
  for (let i = 0; i < this.activeCoinsGroup.children.length; i += 1) {
    this.coinBox.setFromObject(this.activeCoinsGroup.children[i]);
    if (this.playerBoxCollider.intersectsBox(this.coinBox)) {
      this.activeCoinsGroup.children[i].visible = false;
      this.activeCoinsGroup.children[i].position.z += 70;
      if (!this.isGamePaused && !this.isGameOver) {
        this.coins += 1;
      }
      (document.querySelector('.coins-count') as HTMLInputElement).innerHTML = `${this.coins}`;
      setTimeout(() => {
        this.activeCoinsGroup.children[i].position.z -= 70;
      }, 100);
    }
  }
}
We need to update the conditional statement in the keyboard control to restrict the movement of the player when the game is over, similar to how we restrict movement when the game is paused:
document.onkeydown = (e) => {
      if (!this.isGameOver && !this.isGamePaused) {
        if (e.key === 'ArrowLeft') {
          this.moveLeft();
        } if (e.key === 'ArrowRight') {
          this.moveRight();
        }
        if (e.key === 'ArrowUp') {
          this.jump();
        }
        if (e.key === 'ArrowDown') {
          this.slide();
        }
        if (e.key === ' ') {
          this.pauseAndResumeGame();
        }
      }
    };
Implementing Game Restart
This section will add the ability for the player to restart the game when it is over. We will create a new method called restartGame which will hide the game over modal, move the current obstacles and coins out of view, restart the game clock, reset the speed, coins, and score to their default values, reset the player's position, and show the pause button which was hidden when the game ended.
  private restartGame() {
    (document.getElementById('game-over-modal') as HTMLInputElement).style.display = 'none';
    this.currentObstacleOne.position.z = -1200;
    this.currentObstacleTwo.position.z = -1500;
    this.activeCoinsGroup.position.z = -1800;
    this.clock.start();
    this.speed = 220;
    this.coins = 0;
    this.scores = 0;
    (document.querySelector('.coins-count') as HTMLInputElement).innerHTML = '0';
    this.runningAnimation.reset();
    this.currentAnimation.crossFadeTo(this.runningAnimation, 0, false).play();
    this.player.position.z = -110;
    this.isGameOver = false;
    this.isGamePaused = false;
    this.currentAnimation = this.runningAnimation;
    (document.querySelector('.pause-button') as HTMLInputElement).style.display = 'block';
    this.player.position.x = 0;
  }
Next, we will invoke the restartGame method whenever the restart-button is pressed, we will do this on the initialize method:
(document.getElementById('restart-button') as HTMLInputElement).onclick = () => { this.restartGame(); };
Giving the Player three Seconds Head Start before Spawning the Coins and Obstacles
Let's create a new private object called isPlayerHeadStart , and set its default value to false. Once the value is true we will start generating the obstacle and push it toward the player:
private isPlayerHeadStart = false;
Inside the initialize method, let's create a setTimout function that will change the value of the isPlayerHeadStart object to true.
    setTimeout(() => {
      this.isPlayerHeadStart = true;
    }, 3000);
Now, let's create a conditional statement that will check if isPlayerHeadStart value is true, then we will call this.spawnObstacle();, and this.spawnCoin(); inside it.
      if (this.isPlayerHeadStart) {
      this.spawnObstacle();
      this.spawnCoin();
    }
Also, lets add this.isPlayerHeadStart= false; to the gameOver method.
  private gameOver() {
    this.isGameOver = true;
    this.speed = 0;
    (document.querySelector('.pause-button') as HTMLInputElement).style.display = 'none';
    setTimeout(() => {
      this.clock.stop();
      (document.getElementById('game-over-modal') as HTMLInputElement).style.display = 'block';
      (document.querySelector('#current-score') as HTMLInputElement).innerHTML = this.scores.toString();
      (document.querySelector('#current-coins') as HTMLInputElement).innerHTML = this.coins.toString();
      this.stumbleAnimation.reset();
      this.player.visible = false;
    }, 3000);
    this.stumbleAnimation.reset();
    this.currentAnimation.crossFadeTo(this.stumbleAnimation, 0, false).play();
    this.currentAnimation = this.stumbleAnimation;
    this.currentObstacleOne.position.z -= 5;
    this.currentObstacleTwo.position.z -= 5;
    this.isPlayerHeadStart= false;
  }
Finaly, let's make the headstart work anytime the player restarts the game by adding the following code to our restartGame method :
    setTimeout(() => {
      this.isPlayerHeadStart= true;
    }, 3000);
So our restartGame method looks like this:
  private restartGame() {
    this.player.visible = true;
    (document.getElementById('game-over-modal') as HTMLInputElement).style.display = 'none';
    this.currentObstacleOne.position.z = -1200;
    this.currentObstacleTwo.position.z = -1500;
    this.activeCoinsGroup.position.z = -1800;
    this.clock.start();
    this.speed = 220;
    this.coins = 0;
    this.scores = 0;
    (document.querySelector('.coins-count') as HTMLInputElement).innerHTML = '0';
    this.runningAnimation.reset();
    this.currentAnimation.crossFadeTo(this.runningAnimation, 0, false).play();
    this.player.position.z = -110;
    this.isGameOver = false;
    this.isGamePaused = false;
    this.currentAnimation = this.runningAnimation;
    (document.querySelector('.pause-button') as HTMLInputElement).style.display = 'block';
    this.player.position.x = 0;
    setTimeout(() => {
      this.isPlayerHeadStart= true;
    }, 3000);
  }
Increasing the speed as the Player runs and hiding the Player Box
I think it time for us to hide the blue player box that we are using to detect collisions with the player, but before then let's increase the difficulty of the game bit by bit by gradually increasing speed as the player runs in the update method:
    if (!this.isGameOver && this.speed < 400 && !this.isGamePaused ) {
      this.speed += 0.06;
    }
The code above will only increase the speed by 0.06 only when the game is not over or paused or when the speed is less than 400. now we can hide the player box in the load method:
this.playerBox.visible = false;
Saving the High Scores and Coins into the LocalStorage
Let us create a new method called saveHighScore, this method will save the player's score to the local storage only if the current score is greater than the previous high score. javascript
private saveHighScore() {
  const highScore = localStorage.getItem('high-score') || 0;

  if (Number(this.scores) > Number(highScore)) {
    localStorage.setItem('high-score', this.scores.toString());
  }
}
After that, we will create another method called saveCoins. This method will add the player's current coins to the previous saved coins and save it back to the local storage:
private saveCoins() {
  const prevTotalCoins = localStorage.getItem('total-coins') || 0;
  const totalCoins = Number(prevTotalCoins) + this.coins;
  localStorage.setItem('coins', totalCoins.toString());
}
Next, we will update the gameOver method to save the players's score and coins once the player collide with the obstacles by calling saveCoins and saveHighScore in it.
private gameOver() {
  this.isGameOver = true;
  this.speed = 0;
  (document.querySelector('.pause-button') as HTMLInputElement).style.display = 'none';

  setTimeout(() => {
    this.clock.stop();
    (document.getElementById('game-over-modal') as HTMLInputElement).style.display = 'block';
    (document.querySelector('#current-score') as HTMLInputElement).innerHTML = this.scores.toString();
    (document.querySelector('#current-coins') as HTMLInputElement).innerHTML = this.coins.toString();
    this.stumbleAnimation.reset();
    this.player.visible = false;
  }, 3000);

  this.stumbleAnimation.reset();
  this.currentAnimation.crossFadeTo(this.stumbleAnimation, 0, false).play();
  this.currentAnimation = this.stumbleAnimation;
  this.currentObstacleOne.position.z -= 5;
  this.currentObstacleTwo.position.z -= 5;
  this.isPlayerHeadStart= false;
  this.saveCoins();
  this.saveHighScore();
}
Finally, we'll invoke saveHighScore and saveCoins in pauseAndResumeGame method because anytime the game is paused, there's an option to quit the game and we want the player to save his/her coins and high-scores:
  pauseAndResumeGame() {
    if (!this.isGamePaused ) {
      this.clock.stop();
      (document.getElementById('game-paused-modal') as HTMLInputElement).style.display = 'block';
      this.isGamePaused = true;
    } else {
      this.clock.start();
      (document.getElementById('game-paused-modal') as HTMLInputElement).style.display = 'none';
      this.isGamePaused = false;
    }
    this.saveCoins();
    this.saveHighScore();
  }
Detecting Touch Swipe
There are various ways to detect swipes in JavaScript, as it does not have a built-in event for detecting swipes. To detect swipes, we need to find an alternative solution. I found this answer that uses the TouchEvent to detect swipe on StackOverflow by smmehrab very simple and easy to implement.
First, we are going to create four new properties: touchstartX, touchendX, touchstartY, and touchendY :
private touchstartX = 0;

private touchendX = 0;

private touchstartY = 0;

private touchendY = 0;
Then let's create a handleTouch method that will be used to detect swipes on a touch screen device:
  private handleTouch = () => {
    const pageWidth = window.innerWidth || document.body.clientWidth;
    const treshold = Math.max(1, Math.floor(0.01 * (pageWidth)));
    const limit = Math.tan(45 * (1.5 / 180) * Math.PI);
    const x = this.touchendX - this.touchstartX;
    const y = this.touchendY - this.touchstartY;
    const xy = Math.abs(x / y);
    const yx = Math.abs(y / x);
    if (Math.abs(x) > treshold || Math.abs(y) > treshold) {
      if (yx <= limit) {
        if (x < 0) {
          this.moveLeft();
        } else {
          this.moveRight();
        }
      }
      if (xy <= limit) {
        if (y < 0) {
          this.jump();
        } else {
          this.slide();
        }
      }
    }
  };
Add this to the load method:
const gestureZone = (document.getElementById('app') as HTMLInputElement);

if (!this.isGameOver && !this.isGamePaused) {
  gestureZone.addEventListener('touchstart', (event) => {
    this.touchstartX = event.changedTouches[0].screenX;
    this.touchstartY = event.changedTouches[0].screenY;
  }, false);

  gestureZone.addEventListener('touchend', (event) => {
    this.touchendX = event.changedTouches[0].screenX;
    this.touchendY = event.changedTouches[0].screenY;
    this.handleTouch();
  }, false);
}
To prevent users from swiping when the game is over, we will create an invisible div element that covers the screen. This element will be placed on top of the game whenever the game is over, effectively disabling touch input.
Add the following to the index.html file:
<div class="disable-touch"></div>
and this code to the src/style.css file:
.disable-touch {
  width: 100%;
  height: 100%;
  position: absolute;
  display: none;
}
Add this to the gameOver() method:
(document.querySelector('.disable-touch') as HTMLInputElement).style.display = 'block';
Finally, include this in the restart() function:
(document.querySelector('.disable-touch') as HTMLInputElement).style.display = 'none';
An invisible div was created to block the user from swiping when the game has ended. This div will be hidden when the game is restarted.
Adding a temporary Loader
In this part, we will add a temporary loader that will be displayed when the game is being loaded. It's just a gif image with loading animation. Later in this tutorial, we will remove this loader and add another loader that has a progress bar.
Add the following code to the HTML file:
  <div class="loading-container">
    <img src="../public/assets/images/loader.gif" >
  </div>
And this the CSS file:
.loading-container{
  width: 100%;
  height: 100%;
  position: absolute;
  display: flex;
  align-items: center;
  justify-content: center;
}
.loading-container img{
  width: 200px;
}
Ensure that the file "loader.gif" is stored in the "public/assets/images/" directory within the source code of your project.
Add this below await runningScene.load(); in the main function located in the main.ts file to hide it once the runnerScene has finished loaded:
(document.querySelector('.loading-container') as HTMLInputElement).style.display = 'none';
So all the main function should be looking like this:
const main = async () => {
  await runningScene.load();
  (document.querySelector('.loading-container') as HTMLInputElement).style.display = 'none';
  runningScene.initialize();
  render();
};
Summary and next steps
In this part of the series, I explained two different ways to build an Endless Runner Game and then proceed to build the running scene of this game. While building the RunningScene I explained how to:
import the player
play jump, slide, and run animation on the player
move the player left, right, up, and down
create different obstacles and coins
detect collisions between the player and the obstacles
detect collisions between the player and the coins
calculate the scores and display them on the screen
Implement the Game Pause, Game Over, and Restart Game feature
and detect touch swipes on touch devices
In the next chapter, we are going to create the MainMenuScene and link it to the RunningScene.